Tomorrow is my Opening Reception. I have 24 pieces hanging and I cannot wait. I've already had three pre-sales before the opening, and I'm going to feel so good seeing those red dots on the wall tomorrow! Please come join me at JRB.
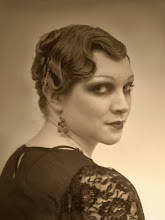
This is the last piece I finished for the show, I haven't had it professionally photographed yet, but a very sharp image should be showing up soon on my flickr. Until then enjoy this little peek behind the curtain. These photos are a bit dark and yellow, but you get the idea. Why dark? Because incandescence lights are relaxing. And I don't like to make process shots into a big production because that creates too much pressure.
Here you can see the first three layers of the piece, the conté sketch, green pencil for shadows and blue for the first of the face paint.

Below I have added the yellow and pink pencil for the face paint, as well as finished laying in green for the shadows.

Jumping ahead, below I have finished the skin tone and have moved onto sketching in the background patterns. If you would like to read more about the layering technique I use to create my skin tones, check out this entry: In Process...

Below, I've gone ahead and thrown some underpainting into the piece so I can see past all the white, I like to think that underpainting will all be covered up so I don't get to precious, however I often like the results and end up using some of the underpainting. In this case I kept the yellow in a great deal of the piece but totally painted out the green in the dress.

Here I've masked off portions of the background design, (see the video below for removal) and I've started adding the background details, this was all very intuitive and happened very quickly and naturally. After that I worked very slowly and over thought almost everything to avoid messing up all that was already good. I haven't sat and just stared at a piece this much in quite sometime.

Below you'll see more background details. I added the vines around the edges and settled on an under paint color for her dress, grey, which I also worked into portions of the background to tie everything together. Not only are designs in the background masked off, but so is her skin and hair so that I can paint more freely. All the splatters on the skin are actually on a layer of frisket.

Below, the background and her dress are finished, consisting of many layers of translucent acrylic paint, drips and outlines of paint pen.

Here is a video of me taking the frisket off of my piece, I'll go back into the blank spaces with paint pen. I also use frisket to block off the skin and hair, so that I can freely paint the background. Why not paint the background first you ask? Well, because I don't like to, and I find that the finished personality informs color and form in the background more.
My wonderful studio engineer and father applies the high gloss varnish to the background. He's much better with sprays than I am. *Note that the colored pencil of her skin and hair are still masked off with frisket, I will removed the mask later, revealing the pencil.

The finished piece! hanging at JRB Art At The Elms.

"Dryad" 36" x 18" colored pencil, acrylic, gouache and paint pen on board
